
Sometimes, you may want to move the iTunes backup location for all your iOS devices from it’s default location to an external hard drive or another partition on your Computer. This article shows you how it can be done on a Windows Computer.
Default iOS Backup Location
The default location for your backup whenever you backup your iOS device using iTunes is usually on the following locations on Windows computers:
On a Windows 7 and Windows 10 PC:
C:\Users\<username>\AppData\Roaming\Apple Computer\MobileSync\Backup
You can also type: %APPDATA%\Apple Computer\MobileSync\Backup
Note: Replace <username> with your PC login name
Moving the iOS Backup Location on Windows
In this example, I’m going to show you how to move the default iOS backup location from C Drive to an external hard disk which is D Drive on my Windows 10 computer (it could be something else on your Computer).
Step 1: Create a new folder named “Backup” (without quotes) in your external hard drive (or the drive you wish to move your backup to)
Step 2: Navigate to the default backup folder. Refer to what I mentioned earlier on the default backup location on Windows 7 and Windows 10. Navigate to:
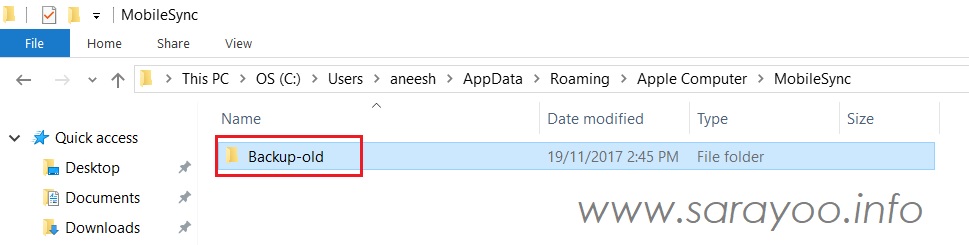
On Windows 7 and Windows 10: C:\Users\<username>\AppData\Roaming\Apple Computer\MobileSync\ and rename the existing Bakcup folder to something else, probably, “Backup-old”.
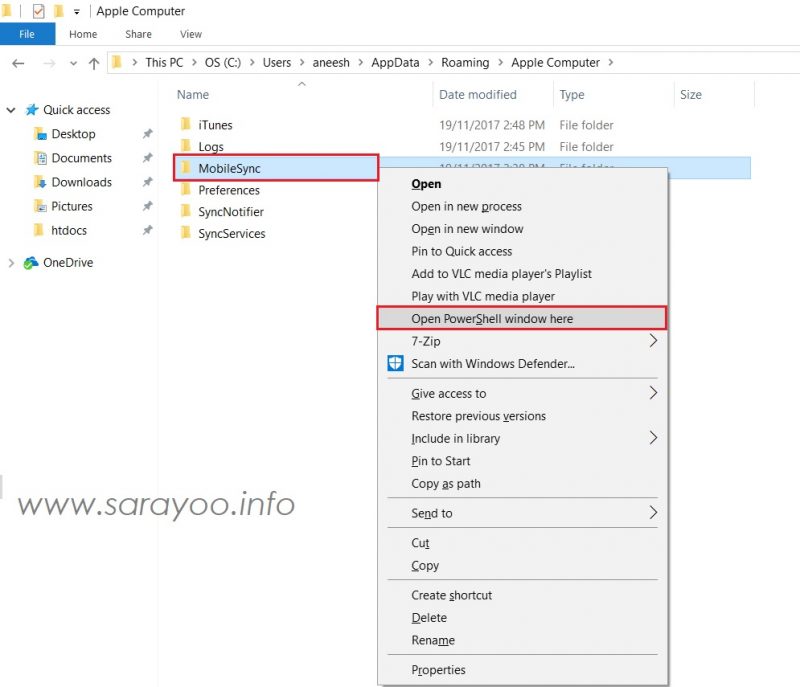
and then press Shift key on your Keyboard and right click on the MobileSync folder >> and then click “Open Command window here” for Windows 7 and “Open PowerShell window here” for Windows 10.
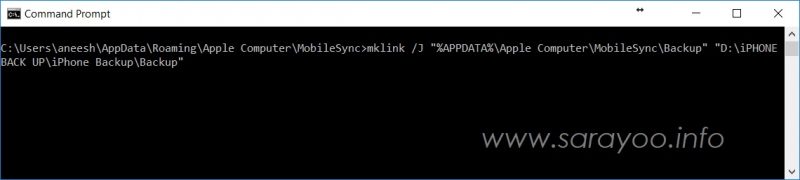
For Windows 7 Users
Step 3: Type the following command in the Command Prompt as shown below and then press Enter:
mklink /J "%APPDATA%\Apple Computer\MobileSync\Backup" "D:\iPHONE BACK UP\iPhone Backup\Backup"
(On my PC, I’m moving the backup file location to my External Hard drive >> iPhone Back up >> iPhone Backup >> Backup. For you, this could be a different location)
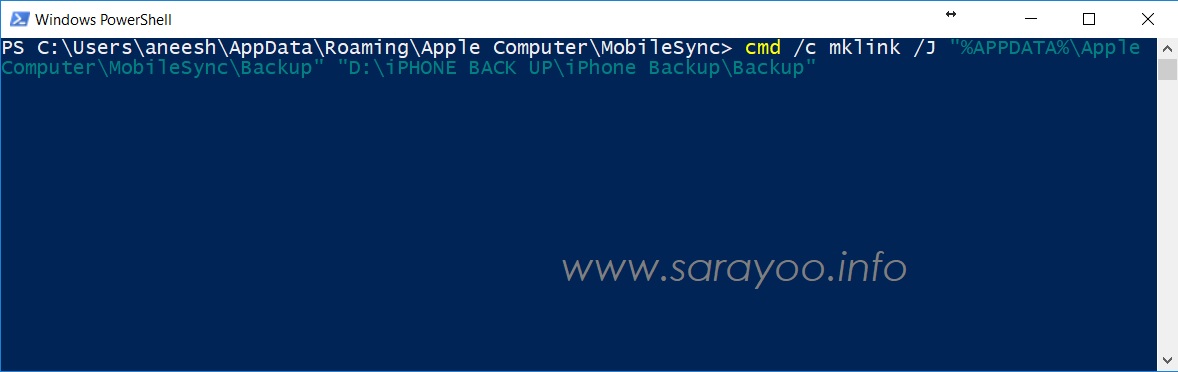
For Windows 10 Users:
Step 3: Type the following command in the PowerShell as shown below and then press Enter:
cmd /c mklink /J "%APPDATA%\Apple Computer\MobileSync\Backup" "D:\iPHONE BACK UP\iPhone Backup\Backup"
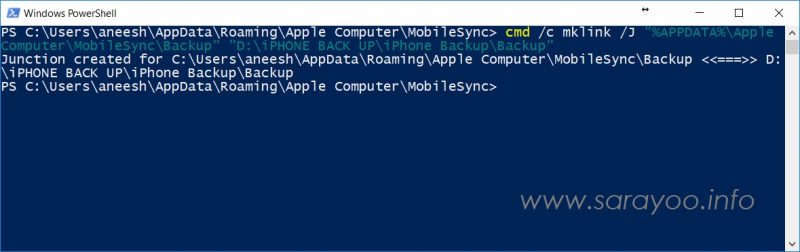
Once you are done with that, you will see a new shortcut named “Backup” appearing in the following location: C:\Users\<username>\AppData\Roaming\Apple Computer\MobileSync\
This shortcut leads to the Backup folder you’ve created on your External hard disk or another drive and becomes the new backup folder for your iOS devices whenever you use iTunes to backup.
Ensure that you plug in your External hard disk whenever you wish to backup or access your backup in the future.

Hope these tips help you! You can follow me on Twitter @sarayoo.info or Google+ or Like me on my Facebook or on my LinkedIn for more updates, technology tips and tricks etc. Please leave your comments in the comment section or contact me if you have any other questions.